


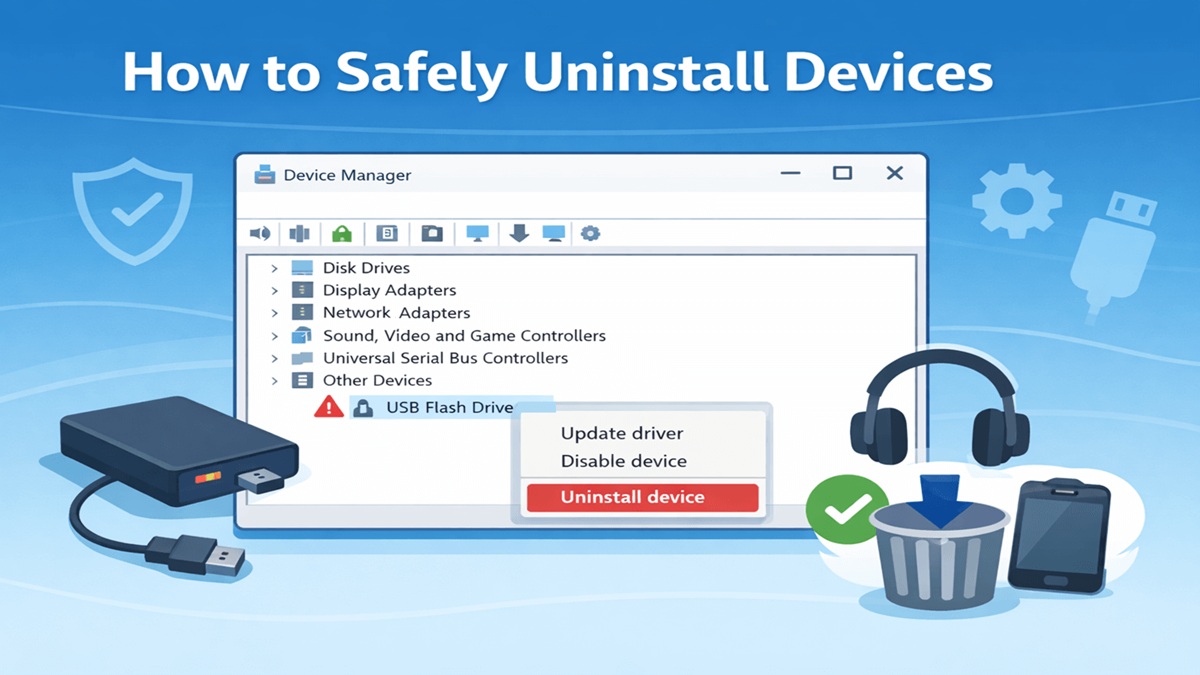
How To Safely Uninstall Devices
By selma čitakovićon 03/15/2026 |
When you connect a device to your PC, your system detects it, installs/loads the needed drivers, and communicates with it. In order to troubleshoot, upgrade, or remove any devices you no longer need, you'll need to properly uninstall them first. Fortunately, it's not that hard to do, as you'll soon see.
But before uninstalling devices, I recommend you physically disconnect/unplug them first. If you don't, Windows may automatically rediscover them right after the uninstallation or reboot, and then reinstall their drivers.
Additionally, you'll have to sign in as an administrator first for these methods to work. With all that said, let's get into it!
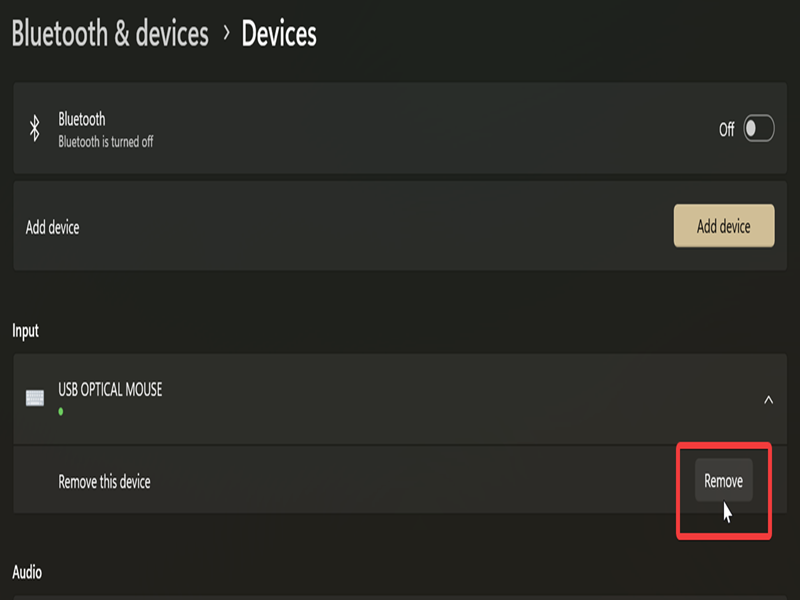
Via Settings
This is arguably the quickest way to remove devices, but it's pretty limited. For example, you can't view hidden devices. So, if you can't find the thing you're looking for, your best bet is Device Manager.
Anyway, here are the steps:
- Go to Settings > Bluetooth & devices > Devices.
- Click on the one you want to uninstall, then hit the Remove button next to it.
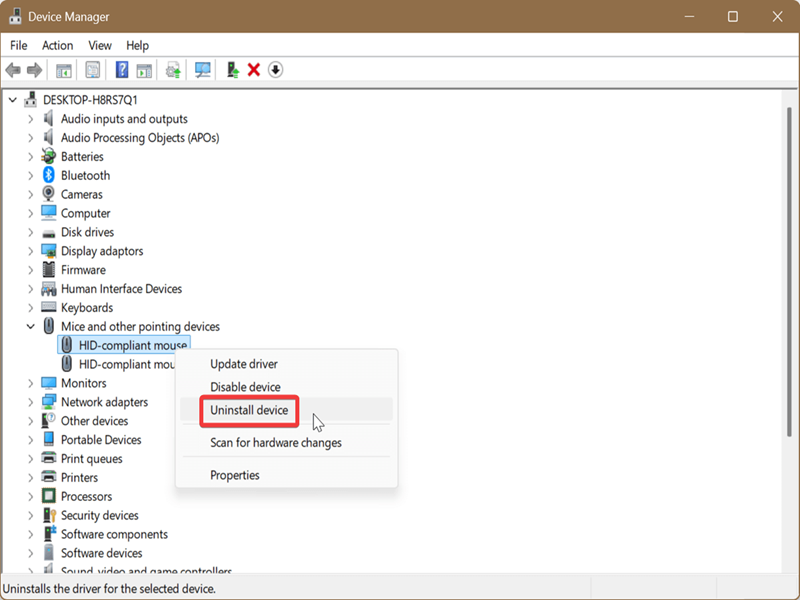
Via Device Manager
Device Manager is a built-in Windows tool that lets you control connected hardware. This includes older devices that aren't currently plugged in, but your system remembers them. If you enable hidden devices, you should see them as greyed-out icons.
To use it:
- Press Win + R and type devmgmt.msc and hit Enter. Or find Device Manager with Windows Search.
- Click View in the top menu bar, then select Show hidden devices.
- Find the category for the device you want to remove and click on it to expand it.
- Right-click the device and select Uninstall device. Alternatively, you can select the device and click on Action in the menu bar, then Uninstall device.
- Click Uninstall on the window that opens up to confirm your decision. You may also check Attempt to remove the driver for this device/Delete the driver software for this device, if available.
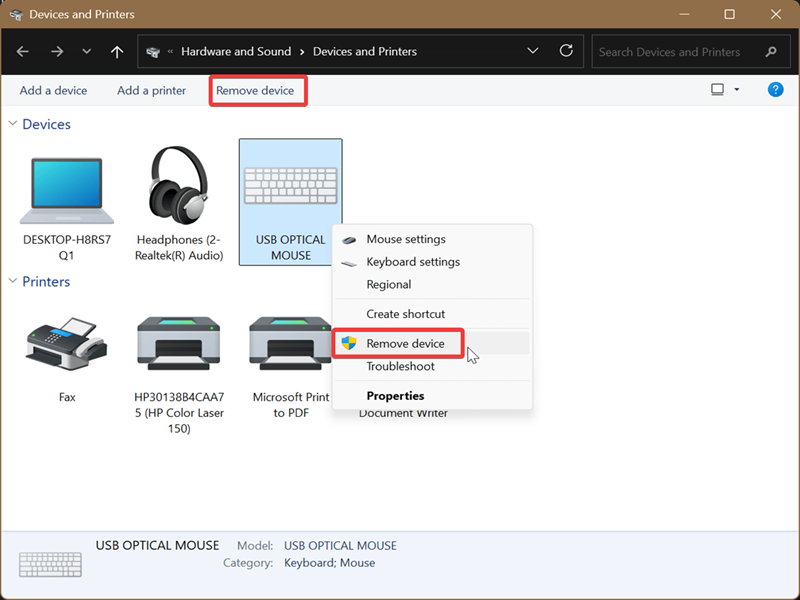
Via Devices and Printers
This is a slightly obscure method, but you might be familiar with it if you're often dealing with printers:
- Go to Settings > Bluetooth & devices > Devices.
- Scroll down and click on More devices and printer settings under Related settings.
- Right-click the one you want to uninstall, and select Remove device. Or, select the device and then click Remove device on the toolbar.
- Click Yes to confirm your decision in the pop-up window.
Via PnPUtil
PnPUtil (Plug and Play Utility) is a command-line tool for managing driver packages. You can also use it to remove devices:
- Open Device Manager as explained earlier.
- Click View in the top menu bar, then select Show hidden devices.
- Expand the device category.
- Double-click the device to open its Properties.
- Click the Details tab.
- In the Property drop menu, select Device instance path (you'll need it in a bit).
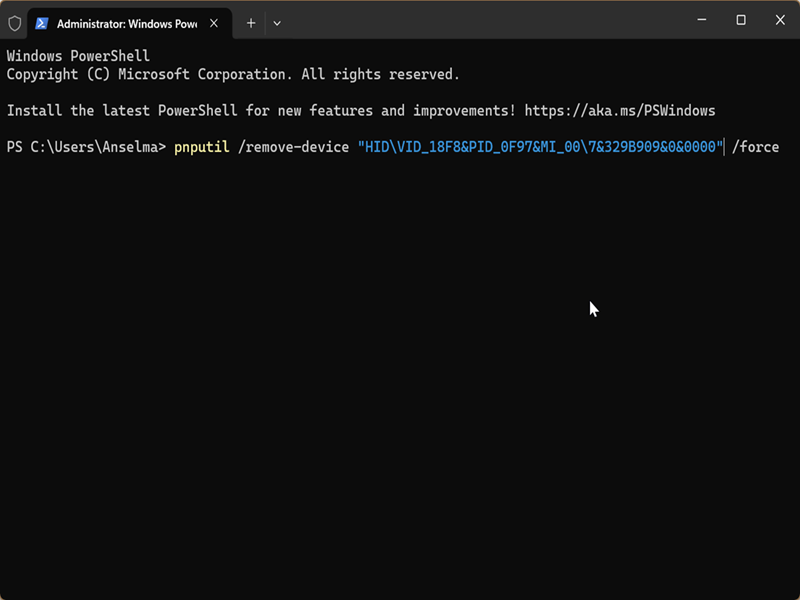
- Under Value, right-click the path and select Copy. For example, for my mouse it's "HID\VID_18F8&PID_0F97&MI_00\7&329B909&0&0000."
- Now, open either PowerShell or Command Prompt. Find it with Windows Search and click on Run as Administrator.
- Type the following command and press Enter: pnputil /remove-device "
" /force - Instead of the
placeholder, paste the actual path you copied earlier.
This method is slightly more convoluted than the others, but I thought to include it if you prefer using PnPUtil. Still, in most cases, Device Manager alone should suffice.

|
selma citakovic
Selma is a gamer, geek and gremlin hunter with a passion for cyber security and smashing Windows bugs before they bite. She’s IBM-certified, loves real freeware, despises bloatware, and powers most of her troubleshooting with an unhealthy amount of coffee. |
comments powered by Disqus
