


How To Disable Snap Layout Suggestions on the Top of Your Screen
By selma čitakovićon 05/02/2026 |
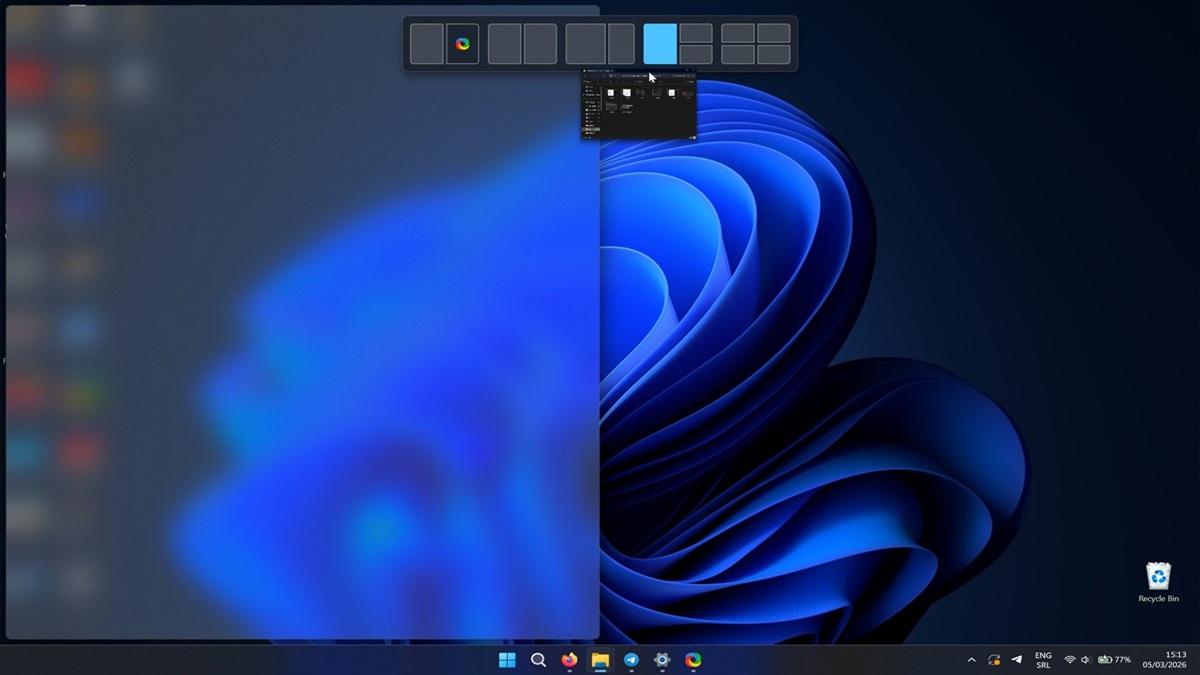
Have you noticed a new snap layout menu appear when you drag a window to the top of your screen? Many users have complained that it interferes with their workflow and adds an extra step to their routine. Wide and ultrawide monitor users, on the other hand, find it convenient.
If you also find it distracting or just plain annoying, I have good news for you. It's very easy to disable once you know where to look for it. I'll show you below, so read on.
Via Settings
You can simply uncheck the option here:
- Go to Settings > System > Multitasking.
- Click the Snap windows option to expand it.
- Uncheck Show snap layouts when I drag a window to the top of my screen to disable it. You can always check it again to enable it.
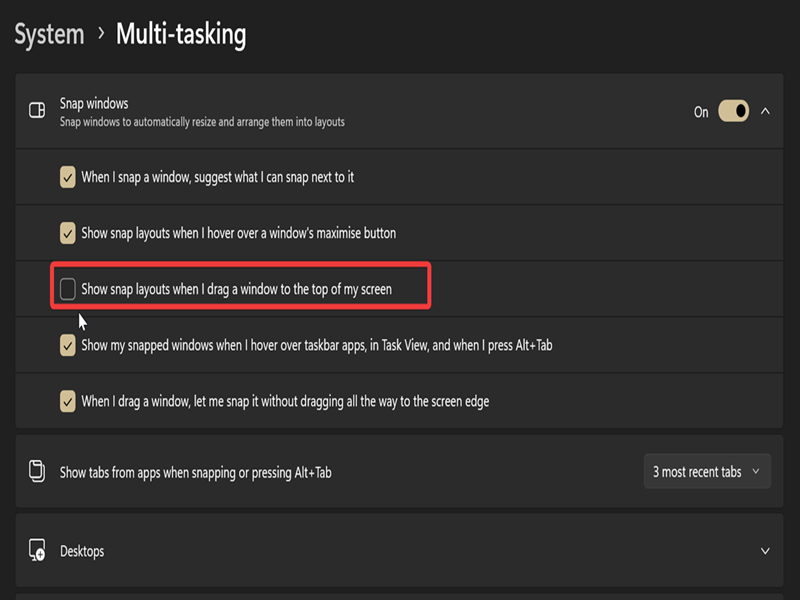
For you to be able to check/uncheck this option, Snap windows has to be toggled on first. You can also uncheck Show snap layouts when I hover over a window's maximize button if this feature distracts you.
Via Registry Editor
Alternatively, you can edit the registry and disable this feature. It's a simple process, but if you're a bit apprehensive about messing around with the registry, you can create a system restore point.
But before we get to the actual steps, you'll need to know your user account's SID (Security Identifier). This is a unique string that identifies an account, group, or process. Here's how to find the SID for the current user:
- Right-click the Start button and select Terminal. Choose either PowerShell or Command Prompt; it doesn't matter.
- Type the following command and press Enter: whoami /user
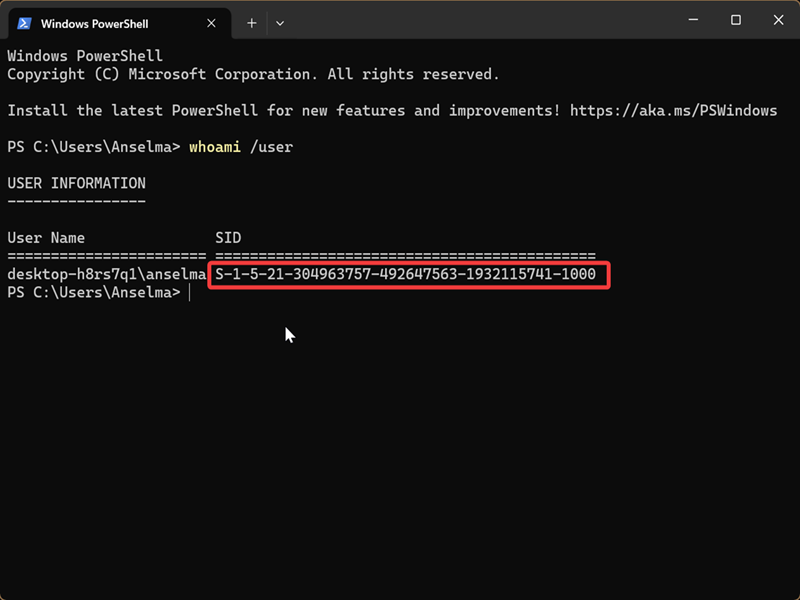
This will display your user name and SID. Keep this tab open, you'll need it in a bit.
Now, let's do some registry editing:
- Press Win + R, type regedit, and press Enter.
- Go to HKEY_USERS\*SID*\Software\Microsoft\Windows\CurrentVersion\Explorer\Advanced. Here, you'll need the SID for your user account to navigate to the correct key.
- While in the Advanced key, double-click EnableSnapBar on the right side.
- Type 0 in the Value data field to disable it, and click OK.
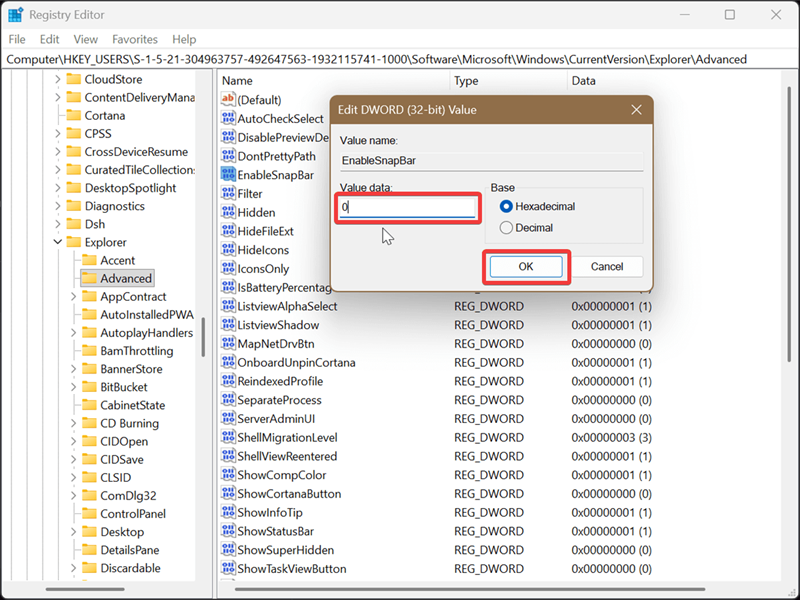
To undo it, type 1 in the same field and click OK.
Similar to the new drag tray, this multitasking feature isn't universally useful or beloved. For many users, it just introduces more clutter instead of genuinely enhancing productivity. But hey, at least you can easily disable it right from the Settings.
On the other hand, if you're not a fan of the new, distractingly large Start menu, it's not so simple. You'll have to use an unofficial tool to get rid of it, and it's not guaranteed to work forever.

|
selma citakovic
Selma is a gamer, geek and gremlin hunter with a passion for cyber security and smashing Windows bugs before they bite. She’s IBM-certified, loves real freeware, despises bloatware, and powers most of her troubleshooting with an unhealthy amount of coffee. |
comments powered by Disqus
